
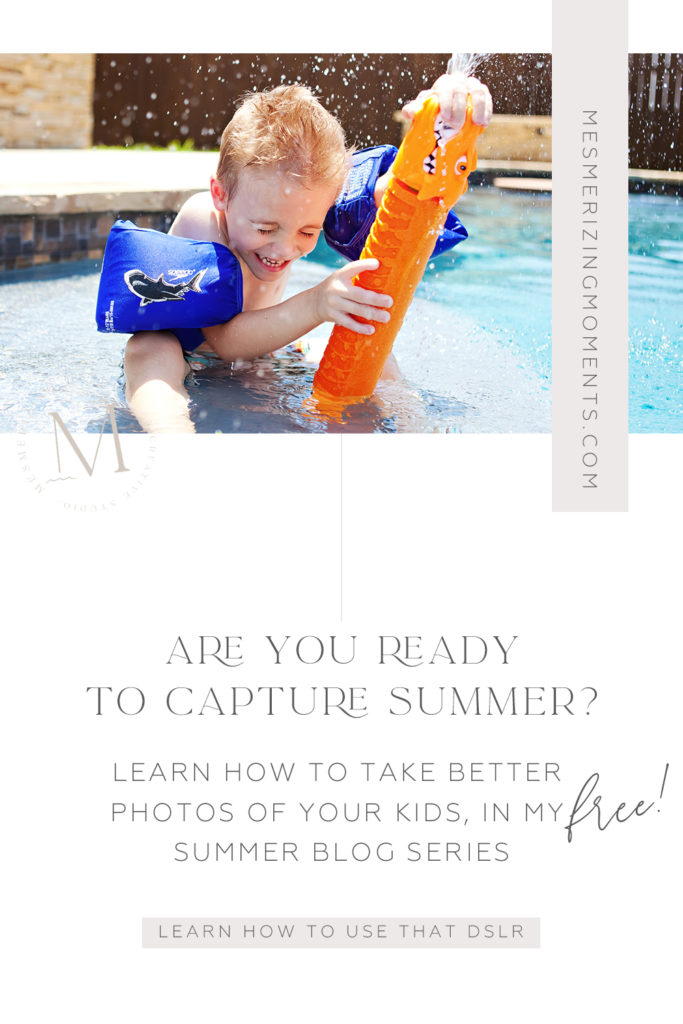
Learn how to take better photos of your kids | Week 2
Learn about my DSLR
A complete guide to using your DSLR camera to get better photos of your children. Learn how to use auto focus when photographing kids.
Week 2 already! I hope you were able to take time to go through week 1 thoroughly, since it was a long lesson! Here is week 2 – all about focus – and then next week we will move into learning how to use manual mode!
FOCUS
All digital SLR cameras have automatic focus + manual focus. I recommend using auto focus 95% of the time – I know, a whole week about don’t use auto, and now I’m all “hey you, use auto!” – haha – BUT focus is different. The focus technology in your camera and lenses are amazing, and lenses are much faster with getting that focus, even in low light situations. I also say stick with auto focus because unless you are using manual focu all the time, it’s a lot harder to do than you would think, and it usually takes longer to get the focus right. When you are using a larger aperture, like f/1.4, and making your depth of field really small, your focus point has to be one very small little spot, so it’s hard to tell through your camera if you have that exact point correct with manual focus.
There are a few times when switching into manal focus makes sense though, sometimes you will find your lens is searching for the focus and cannot find it, this can be because it is too dark, or something like what you are focusing on has no texture or change that your lens can grab onto. In these cases it would be smart to switch it over to manual focus. Another instance would be when your subject is moving very fast and you know where they will be when you want to take the photo. Like jumping shots. What I do is have my subject jump to see how they jump, do they lean forward, lean back, jump high, or low? Then I have them stand and put their hand up in the sky right about where there face will be on the next jump, and I usually manually focus on that. I have them jump and take the shot when their face reaches that place where their hand was. Now, you might be thinking why not just auto focus on their hand, and here’s why – when your camera in in auto focus mode, you are pushing your shutter release button halfway to get the focus, then all the way to take the photo. So, with shots like this, I could accidently take my finger off the shutter release, then when my subject jumped and I want to snap, my lens would start searching for a new focus point again, and I would miss the shot. Auto focus would need a new setup each shot too – that makes sense right? It’s much easier to have my subject help me out with their hand one time at the beginning, and then snap away while they jump over and over, just keep them in the same place and you’re good to do a few tries for that perfect shot.
Manual focus definitely has its place and time, and it’s really good to understand and know everything you can about your camera, so this would be a great practice point! Go out and play with your manual focus, so you can get a feel for it, and then try a few jump shots with a subject, in manual focus, using the method I mentioned above. Once you have taken the photo, zoom into their face at 100% on your screen and see how close you were. This will definitely take practice to get perfect, but don’t worry about it, just have fun with it. And remember – if your aperture is closed down, you’ll have more depth of field (or wiggle room in this case) to get that subject in focus. So start high, maybe f/11 and work your way down, as low and wide open as your lens will allow.
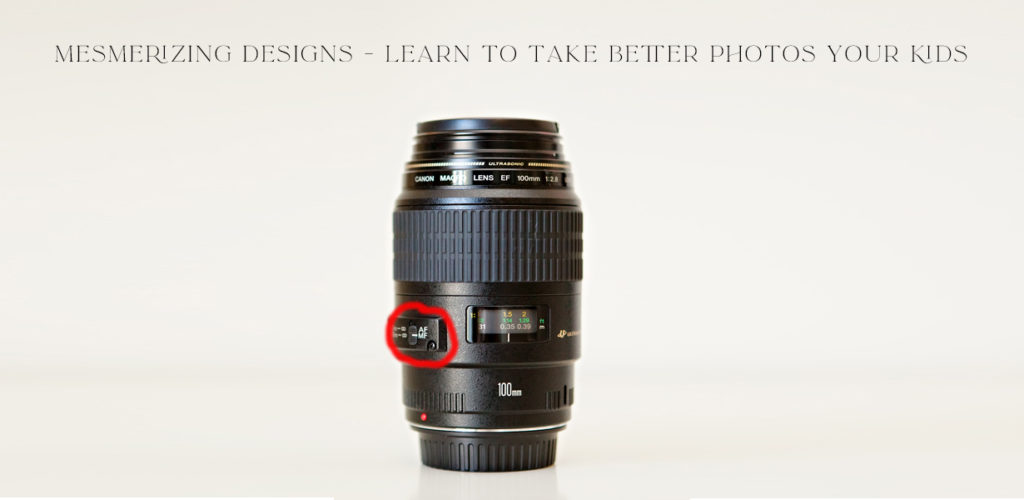
Your manual/auto focu switch is found on the side of your lens like the image above.
- Quick tip! This can sometimes easily be switched when you are handling your lens, so if your auto-focus isn’t working one day, check here first :)

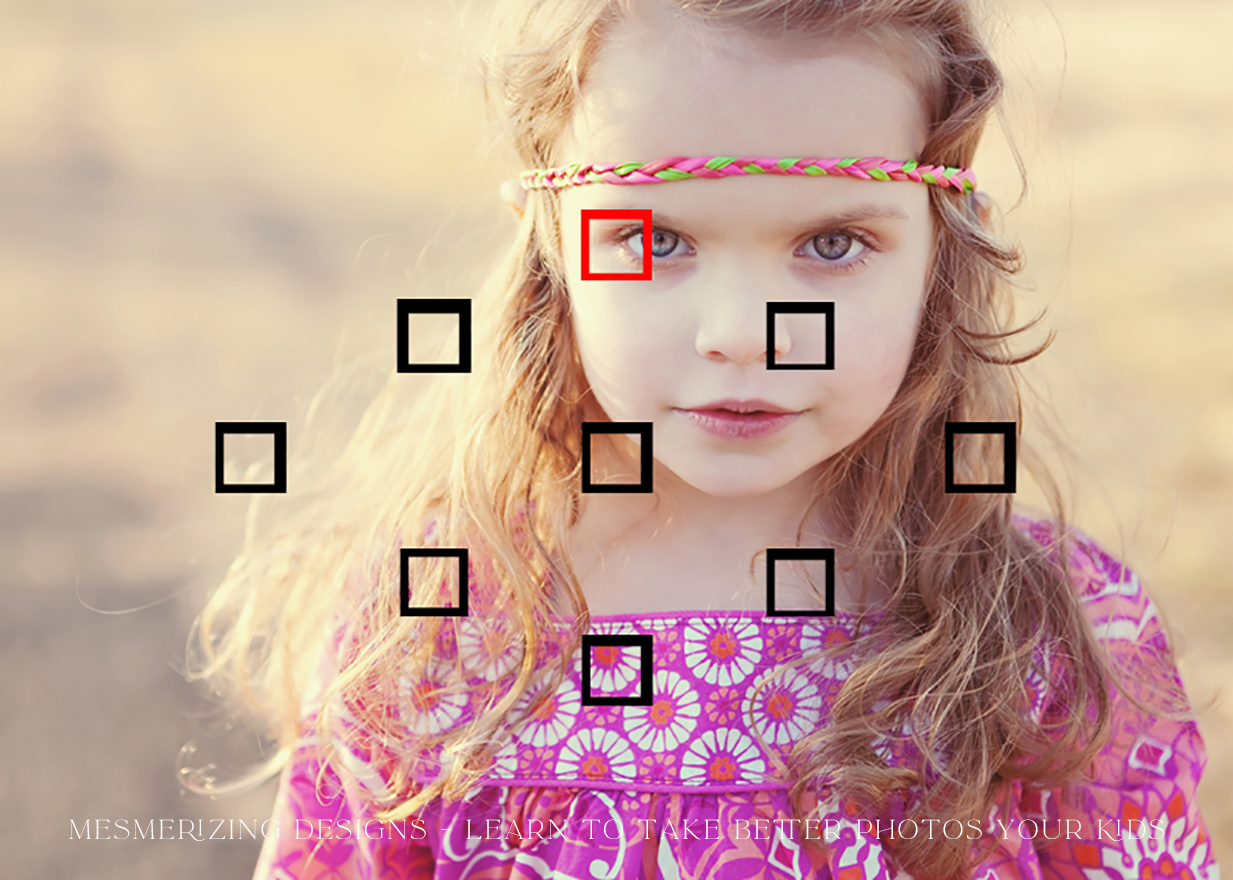
The second part of focusing, auto focus points. Another beauty of the digital SLR camera is more than one focus point, and the ability to change them to suit your needs. Every camera is different, but you should have at least 5 different points to choose from. If you do not know how to change these, please get your manual out and learn which button it is for you. This is something that is so super simple and small, but having the focus points on “all” can ruin a photo quicker than any camera setting! If you do not know what I am talking about when I say “focus points” I am talking about those little boxes that light up red when you look through your viewfinder and are focusing, the look something like this.
Now, here is how they can easily mess up your photos – when you have it set to all focus points, the camera will choose whichever focus point it wants to be the focus, and while it can choose more than one, sometimes it won’t.
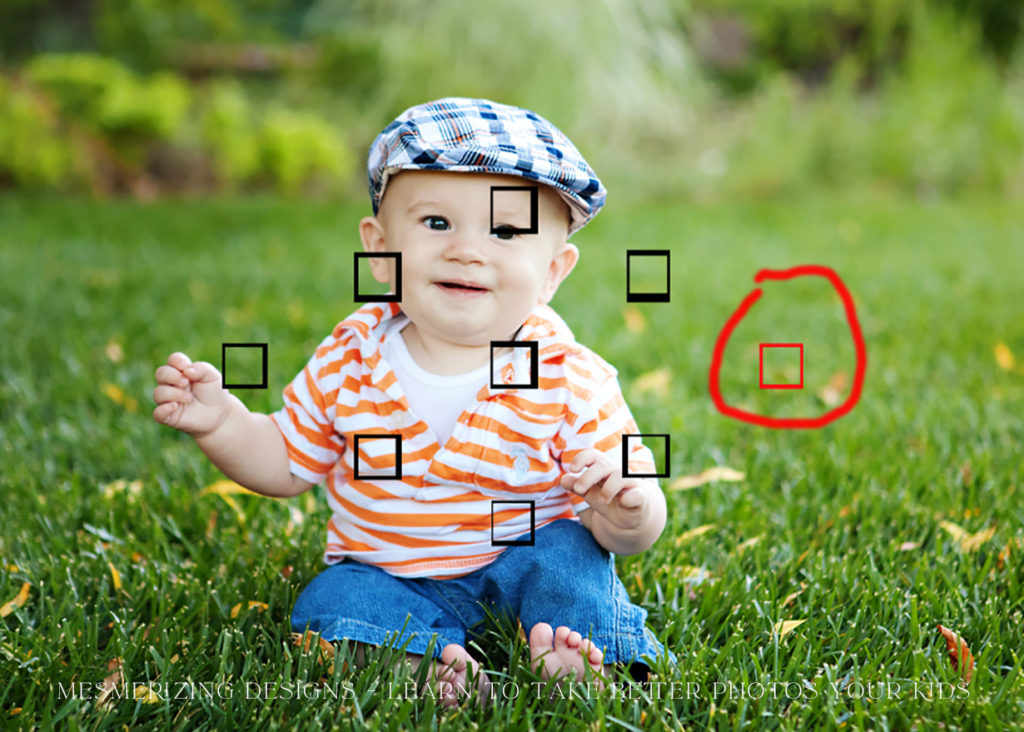
So, excuse my sloppy made focus points here, but what if you wanted your subject off to the side, but your camera chose to focus on the background, like say it chose this one circled in red because there was a big bright leaf on the ground there, or something similar. – That would have ruined this photo, right? That leaf would have been sharp, and the baby would have been all blurry :(
So, this just goes back to not letting your camera think for you. While they are very smart, they are not creative like you, and until you tell your camera what you want you will never be 100% satisfied with your photos. The solution for focusing points is so simple – so why not take a second right now to set your camera how you want it, and I promise you will never again let your camera choose “all” focus points. Here is what I suggest – read your camera manual and figure out how to choose one focus point, then set it to the middle focus point. This is where I suggest leaving it for beginners, but what I want you to do is learn how to easily change through all the focus points once you have your camera set to one focus point. It’s just the click of a button and the turn of a dial on a Canon, and once you begin using them you will be able to switch through them without even realizing it.
Now, when you take a photo – where do you want your focus point to be? On your subject’s eye. The eye closest to the camera. So, if you are setting up a shot where your subject is off to the side, you need to be able to switch that focus point over quickly, that’s why it’s great to have practice moving them around before-hand. If none of your focus points land right on the eye (common), then focus and recompose, and that is done like this – choose the one that is the closest to your subject’s eye, then focus the camera there by pressing the shutter release halfway, then just slightly move your camera over to where you want the image frames without letting go of your shutter release, and when the image is composed how you want it, finish pressing the shutter release button to take the photo. Now, when you are focusing and recomposing, you will keep your focus as long as you don’t move toward or away from your focal point. You can shift side-to-side and top-to-bottom all you want, because remember back to the aperture lesson, your focus point works on a plane from your camera lens, so it makes sense that you can move your camera all you want after focusing, as long as you don’t break that plane – by moving your camera toward or away from that focal point.
This is a great practice point! I want you to learn how to easily change those focus point when shooting, and practice using all the focus points available to you, so make sure you dedicate time to just getting this down, and can move from point to point while behind the camera.
This is all especially important when taking photos of those kids who never-stop-moving. Great practice with moving those points – focusing and then recomposing – and doing it all really quickly will go a long way to make those images great!
I want you to play with all your other settings for a while first, so before you dig further into this little class make sure you are taking the time to learn and practice your buttons. I don’t want to overload you, and if you go into this next section without some practice in shutter speed, aperture, focus, and ISO I think it will only make it harder. So, please don’t read onto next week until you have devoted time to your camera and learning how it works in regards to shutter speed, aperture, and focus. You will not completely understand it at this point, that will only come with more time in manual mode, but I just want to make sure you mostly understand those basics before we move on, because next week it’s up – the dreaded M mode! haha Really not that bad, I promise! We got this!!
Hope you’re having a good summer, enjoying some sun, and enjoying this guide too! See ya next week :)
xo, jen
save / share this post
TURN HEADS WITH DESIGN THAT RESONATES
Branding & Web Design
Establish or refresh your brand’s visual identity with entirely custom designs that grow your business.


Template Customization
Tailor your chosen Showit website template to serve your very own business style and goals.
Get the Details
Learn More


