
Inking
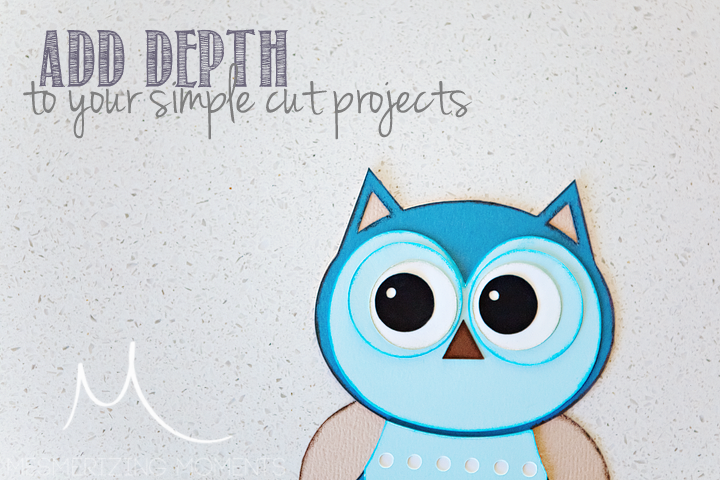
I’ve been “inking” my craft projects for a few years now, and I love it! It’s such a simple way to add so much depth & dimension to your cut projects. If you haven’t tried it yet, check out this simple tutorial, and I swear, you’ll never go back to plain ol cutting & pasting again!
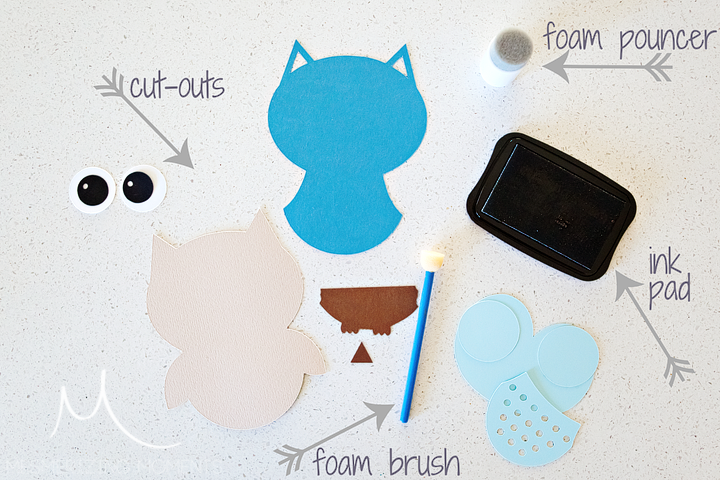
You’ll only need a few things ….
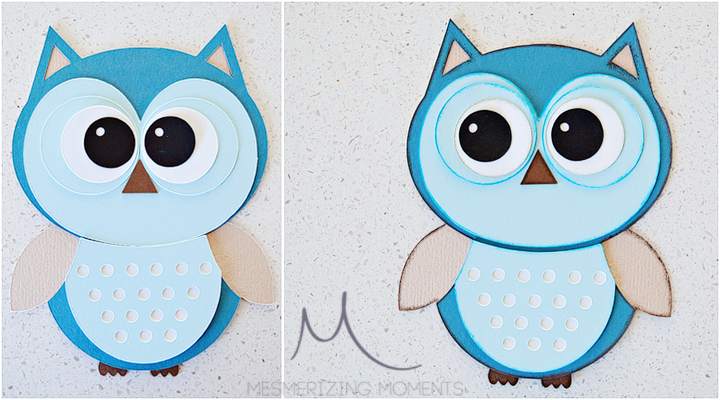
Your cut out objects (here I’m making this cutsie little owl, so I have all his little body parts ready to go from my silhouette machine)
A foam brush or pouncer – sometimes you need a really small one to get into the nooks and crannies, even way smaller than I have pictured here
ink pad (whichever color or colors you want to use!) Have fun here too – I love using blue on the white parts of eyes to give them some color. Using the same color as your paper but a deeper tone always looks great as well. Or experimenting with opposite colors can work out beautifully too!
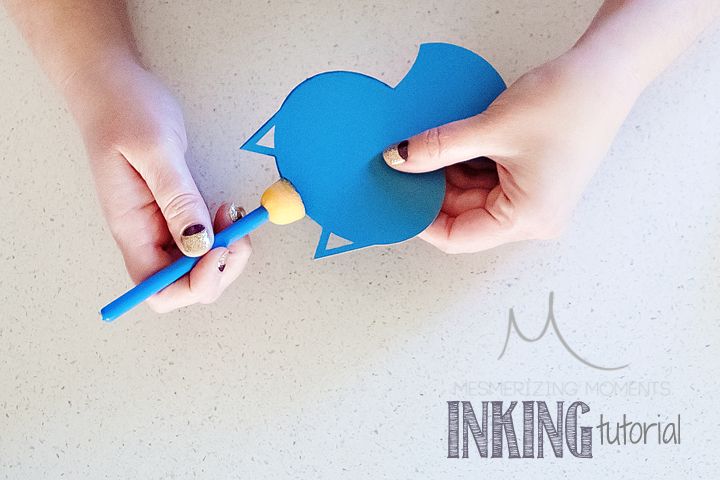
Then, you literally just simply take your foam piece, dab it into your ink, and scrape it along the edging of your cut-outs. It goes really quickly. I usually do one light pass all the way around, and then go back for a second pass if I want to. Play around here too, because you will see the more you angle your brush, the more or less it will spread the ink, and some things look better with just a little inking, and of course, some look better with a lot.
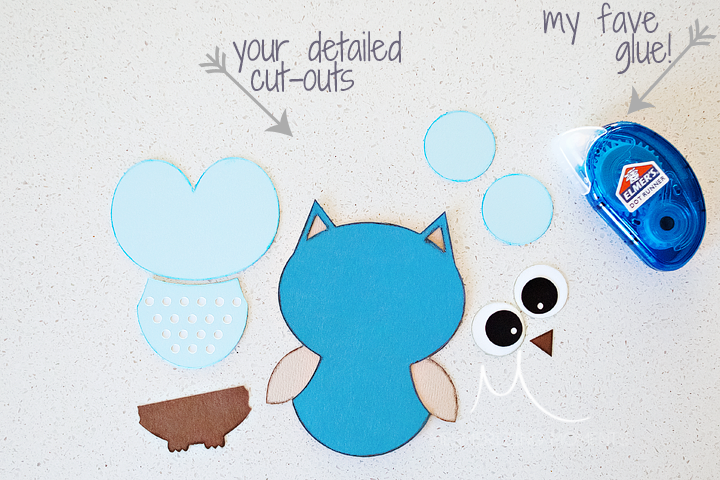
When you have all your pieces ready to go, just put your cut out together. My favorite glue is actually the Elmer’s Dot Runner – it’s one of those refillable containers, and I love it! It works so so well! You can reposition if you absolutely need to, if you act quickly, and you can rub away any extra along the edges easily, and it holds everything in place perfectly! Highly recommended!
Anyway, that’s it! See, told ya easy enough! And it’s such a big difference for the amount of work needed! I love it.
My next inking project is 25 of these birthday invites … what will yours be?
Happy crafting!
save this
posted in:


