
Five Fact Friday
It’s a little sad that FFF is making it’s comeback on a Sunday, haha but better late than never, right? Well, that is what I am going to tell myself today at least :) So, here it is, and it’s here to stay this time, really!!
#1
We did our pics for our Christmas cards this week, and I love them! Something fun and different for us this year, they are super silly and cute :)
I will for sure share as soon as they are sent out!
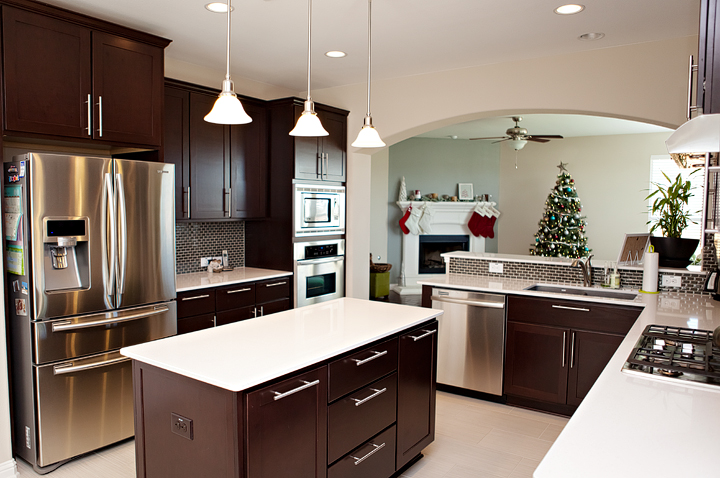
#2
I’ve been beyond busy lately! I’m sure you know that already, with my lack of internet presence, but our house is finally finished, and we were able to move in! YAY!! So, now I can get back down to it, and start the business back up here in Round Rock, I’m really excited, and although I know it will take time, I am liking that aspect of it. Lots of family time, with just the right amount of work… perfect! Anyway, here’s a little sneak peek at my kitchen, things are slowly coming together here :)
#3
Yes, I already have my Christmas stuff up, it makes me happy :)
#4
Even though I haven’t shared a lot online, I have been so great in keeping up with Sniggs’ 2011 album! I am so proud of myself with this one, and I cannot wait to get it all together into a book! Sometimes the pics don’t make their way off of my camera for a few weeks, haha, but they are always taken, so yay!! Here’s a peek at the album so far, only like 6 more weeks to go!
You can view each page in the fb album – here – if you want :)
 #5
#5
I’ve had a lot of questions about my personal family photo wall, so I thought I would share the answers here with all of you too :) The biggest question has been how I get everything so straight, so here’s the way I do it, I hope it helps some of you!

First, make sure you start with an overall style that matches your house, so you will always love it! Since my house is very contemporary, I did all black and white photos, and I got a variety of frame sizes, but I kept all the frames the same. Then when I had all my photos chosen and ready to go I laid everything out on the ground, and just played around with the arrangement until I was happy, this is actually the easiest part for me, but if it’s not for you, take some time, and don’t stress about it. Maybe even leave it out for whole day if you can, to walk by it several times making sure you are happy! Then I get those 3m Command photo strips from any store, like Target, and I use those to put everything on the wall. If you haven’t used these yet, don’t be afraid to!! From experience, I know they hold for at least a few years if you use them properly! I use them for everything, and I love them!! So, back to the wall, since I did a center horizon line in my display, I just measured out my wall, and figured out where I wanted my center point, then for the horizontal line I taped off a straight line with painters tape, then used that to work from. I started with the top half, placing the 3m strips on the back of my large top left quarter family photo, and pressed it into the wall along the top of the tape line, from there I just worked my way one photo at a time out and up to finish the top left quarter, then the top right quarter from the center as well, then I removed the tape and worked my way with the bottom half the same way. Super easy, and when I attached one that was a little crooked (since I was doing all that by hand, haha) I just un-attached it from the velcro on the wall, and re-positioned it into place. That might read like a lot of work, but I promise, it’s beyond simple! No nails, no holes, no math to divide out where the photos should be (well, ok, except for finding your center point) but really, super easy, I promise, so no more excuses!
Get those photos up, I know once you do, every time you pass by them they will make you smile :) Happy hanging!
save this
posted in:


