

Laundry Room Update
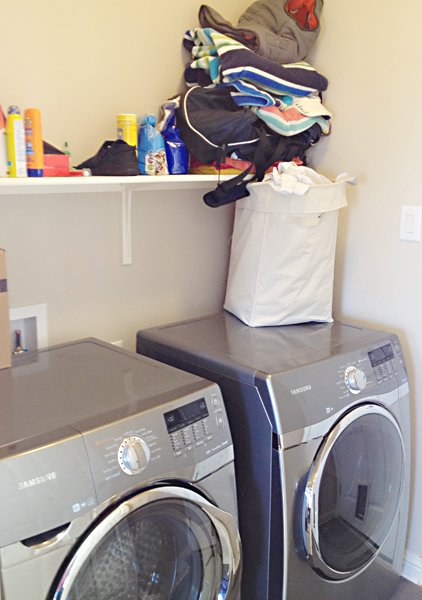
Oh man did my laundry room need an update! Here’s the before photo –
I’ll wait while you go ahead and pin that bad boy, haha
Anyway, I’ve always been a front door entry kind of girl, but my hubbs has really been pushing the whole becoming the “parking in garage kind of girl” thing. So, with a few conditions, I caved. One thing I always wanted was one of those amazing mudrooms, but it just wasn’t in the cards for us, and this is the tiny little room between the garage door and my house. The back entry to the garage from the house has a sliding Door Lock Mechanism, but as the door leads right into the garage we mostly keep it open for the dog. But I still was looking for a garage door service, as the sliding was a bit rough. So, one of my conditions, the main one really, was re-do that gross annoying laundry room and take care of that door. I hated coming in through that mess everyday – the tiny little builder’s shelf drove me crazy, and everything I placed on the machines fell through the cracks.
UH-NNNOOYYYYYIINNGGG!
I know it’s a small space, and I can’t really change that on a little budget, but at least I could make the best of it. Great ceiling height to bring storage & design all the way up, and the perfect depth to cover the machines! I’ll take it :) Here’s what we came up with on a $650 budget.
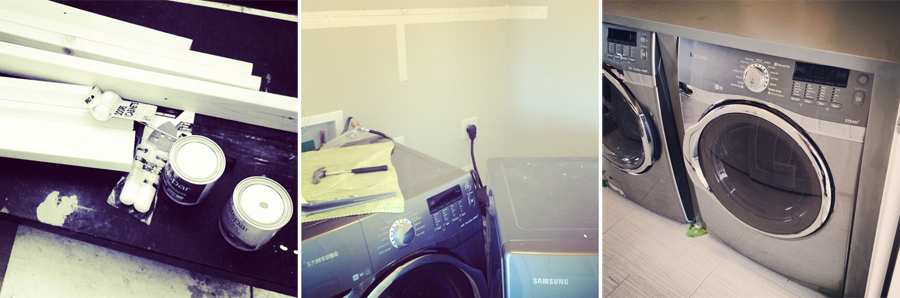
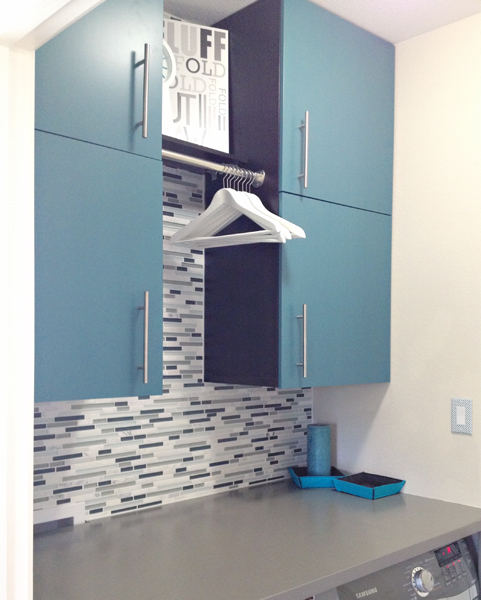
I knew I wanted cabinets to the ceiling, and a countertop, and a backsplash – so we started at Ikea, and I fell in love with these teal cabinets – I mean if you can’t do a fun color in your laundry room, then where?! They were for an entertainment system, but the size was perfect, so hubbs said he could rig the back to secure them to the wall, and create hanging cabinets with them. 2 cabinets & 4 doors. – Done & done.
We looked through countertops, but everything had a 15-20 sq ft minimum, we only needed 8sq ft – lame. haha We shopped around for countertops elsewhere, but they were either too expensive, didn’t match the kitchen (which is right by the laundry room) or had a minimum order. So we decided to just make one with wood, and paint it. Hubbs built a frame around the washer & dryer & then we actually found a butcher block slab that was just a little too big each way, and we cut it down. Perfect. Hubbs fit it in, and then primed and painted :)
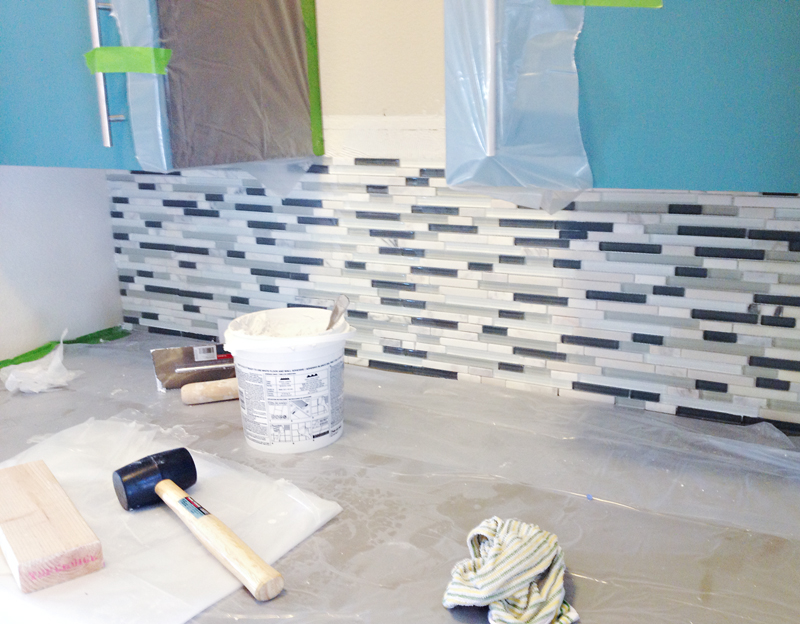
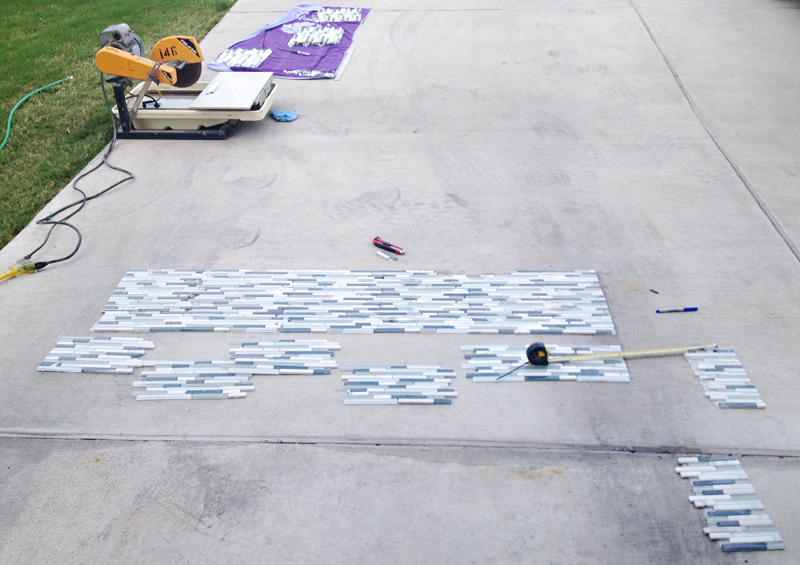
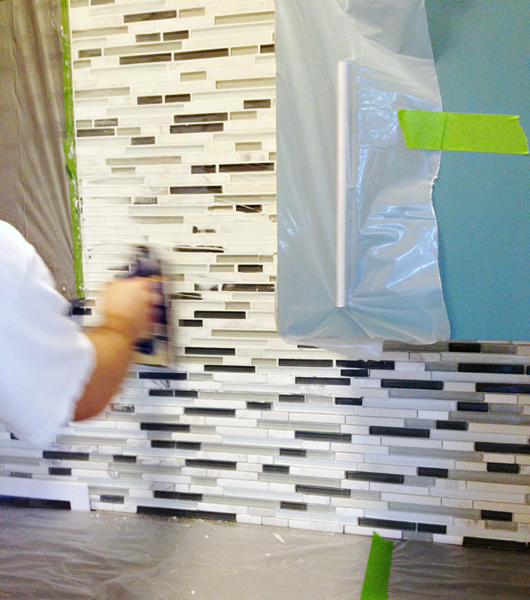
The backsplash was a fun project too. Surprisingly, hubbs is awesome with tile. Who knew, haha. It was sooooo worth making that a DIY step! We bought the tile, grout, and mud at Lowes, and then rented a wet tile saw from a local equipment rental place for the day – for only $40! You will also need a sponge, bucket, trowel, & rubber mallet if you don’t have those. We just laid out the tile in the driveway, made our measurements and our cuts, laid it back out how we wanted it, and then started putting it up. Grouted the next day, and then we were done. It really was pretty easy! If you are scared to tile, seriously, don’t be! The tile will come with step byt step instructions, and you can do it!! :)
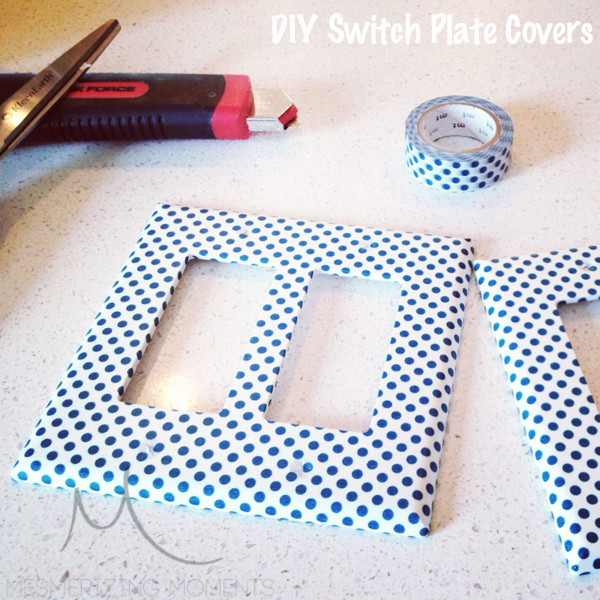
We had extra handles from our kitchen cabinets too, so we put those on, and then I did a little DIY finishing touch, I covered the switch plate covers with washi tape – nothing like some teal polka dots to make a girl smile when she walks in the door, right?! They turned out awesome – I was a little unsure of what I was doing, haha, but went for it, and so glad I did! (I have since even covered all the covers in my kitchen with a grey design too!)
Anyway, here’s the final result – I *may* be a little obsessed with it – plan worked well. Came in on budget, and now I love parking in the garage and coming through this little room, so win win.

And since that photo, we have added a shelf and a few little extras….
So, what do you think? What is your favorite part of your laundry room? I eventually want to add a sliding door to the kitchen area, so I have more wall space where the door is always opened, so I can place some fun hooks and hang backpacks and things :)
save this
posted in:


